UV tips and tricks - Part III
Hey guys, this is the third part of my series of UV tips and tricks for Visual Effects. This one I focus on unwrapping and laying out organic models. (Some concepts can apply to hard surface as well)
You can check part I and II here
https://www.artstation.com/artwork/aRyyn2
https://www.artstation.com/artwork/DxYJ3E
Part IV is the last chapter and it is coming soon! I'll post a full video unwrapping a complex piece from start to finish.
You can check a more in-depth article about UVs on my website: http://www.paulhpaulino.com/6-tips-to-improve-your-uv-mapping-workflow/
Let me know in the comment section what kind of breakdown you would like to see in the future!
The Cassowary model used was provided by my friend Daniel S. Rodrigues: https://www.artstation.com/artwork/KzkXo

I use this method to establish the resolution of my UVs. This part is extremely important and can save you a lot of time later on. That being said, be careful to not have a crazy amount of resolution, it can slow down your process.

That's how I usually break down and layout my UDIMs. The empty rows are optional.
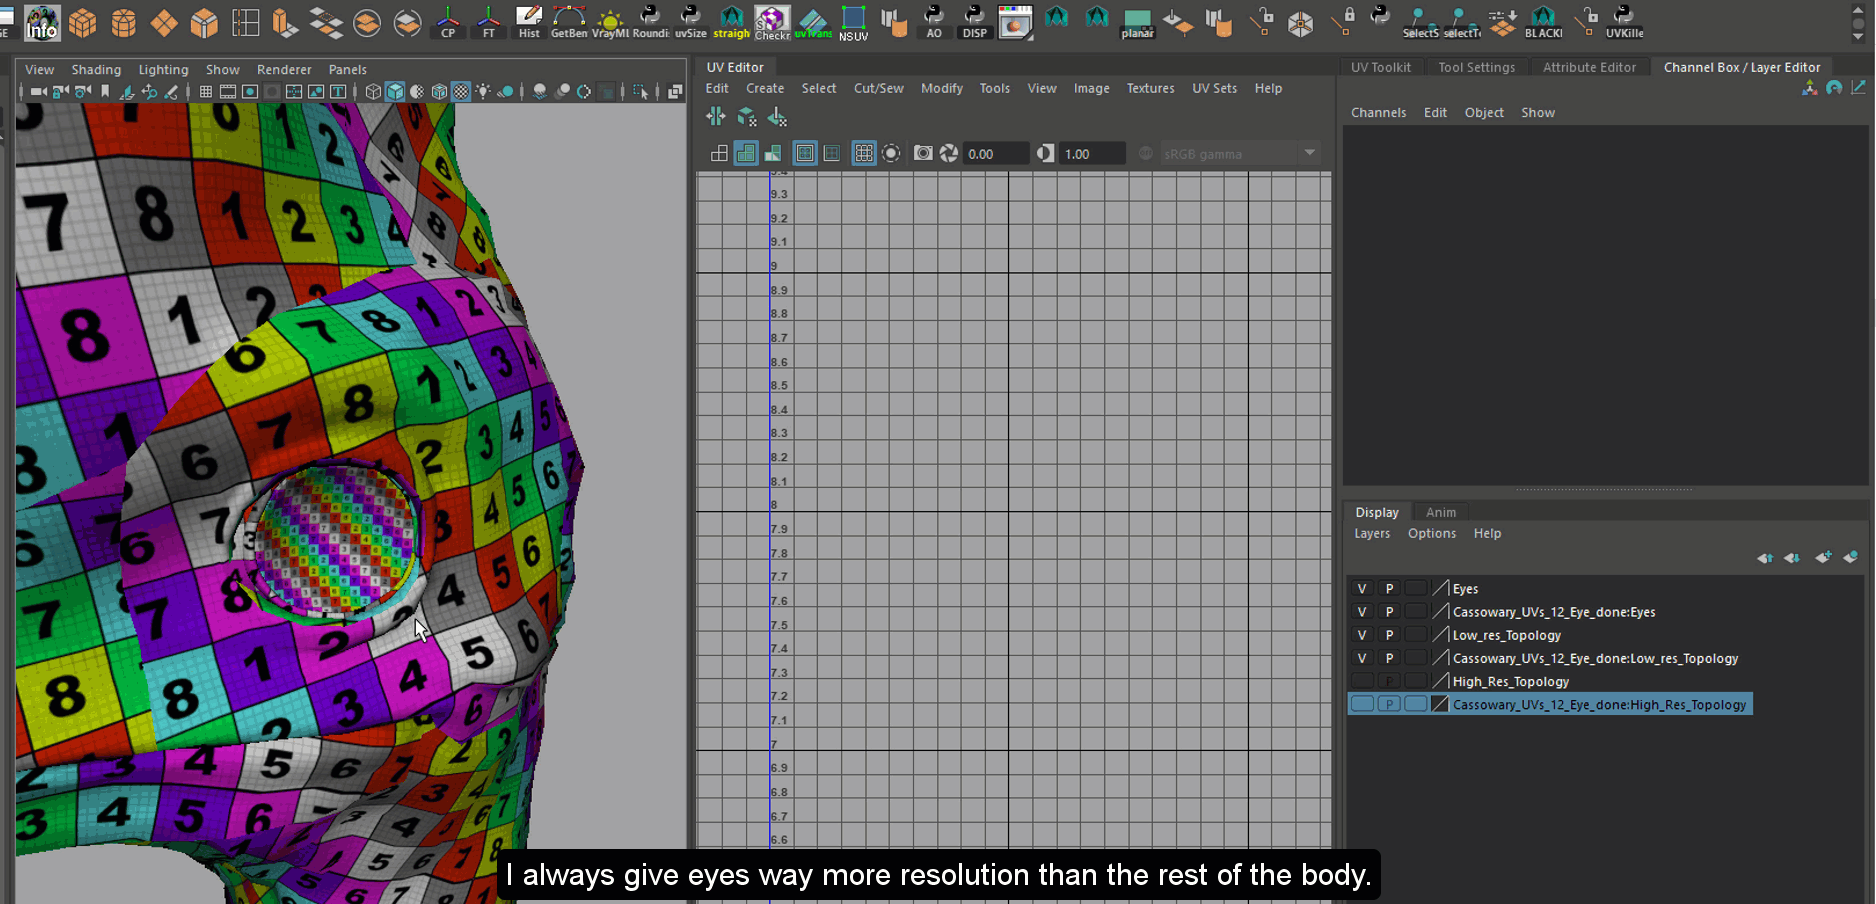
I always have more resolution for my eye pieces.
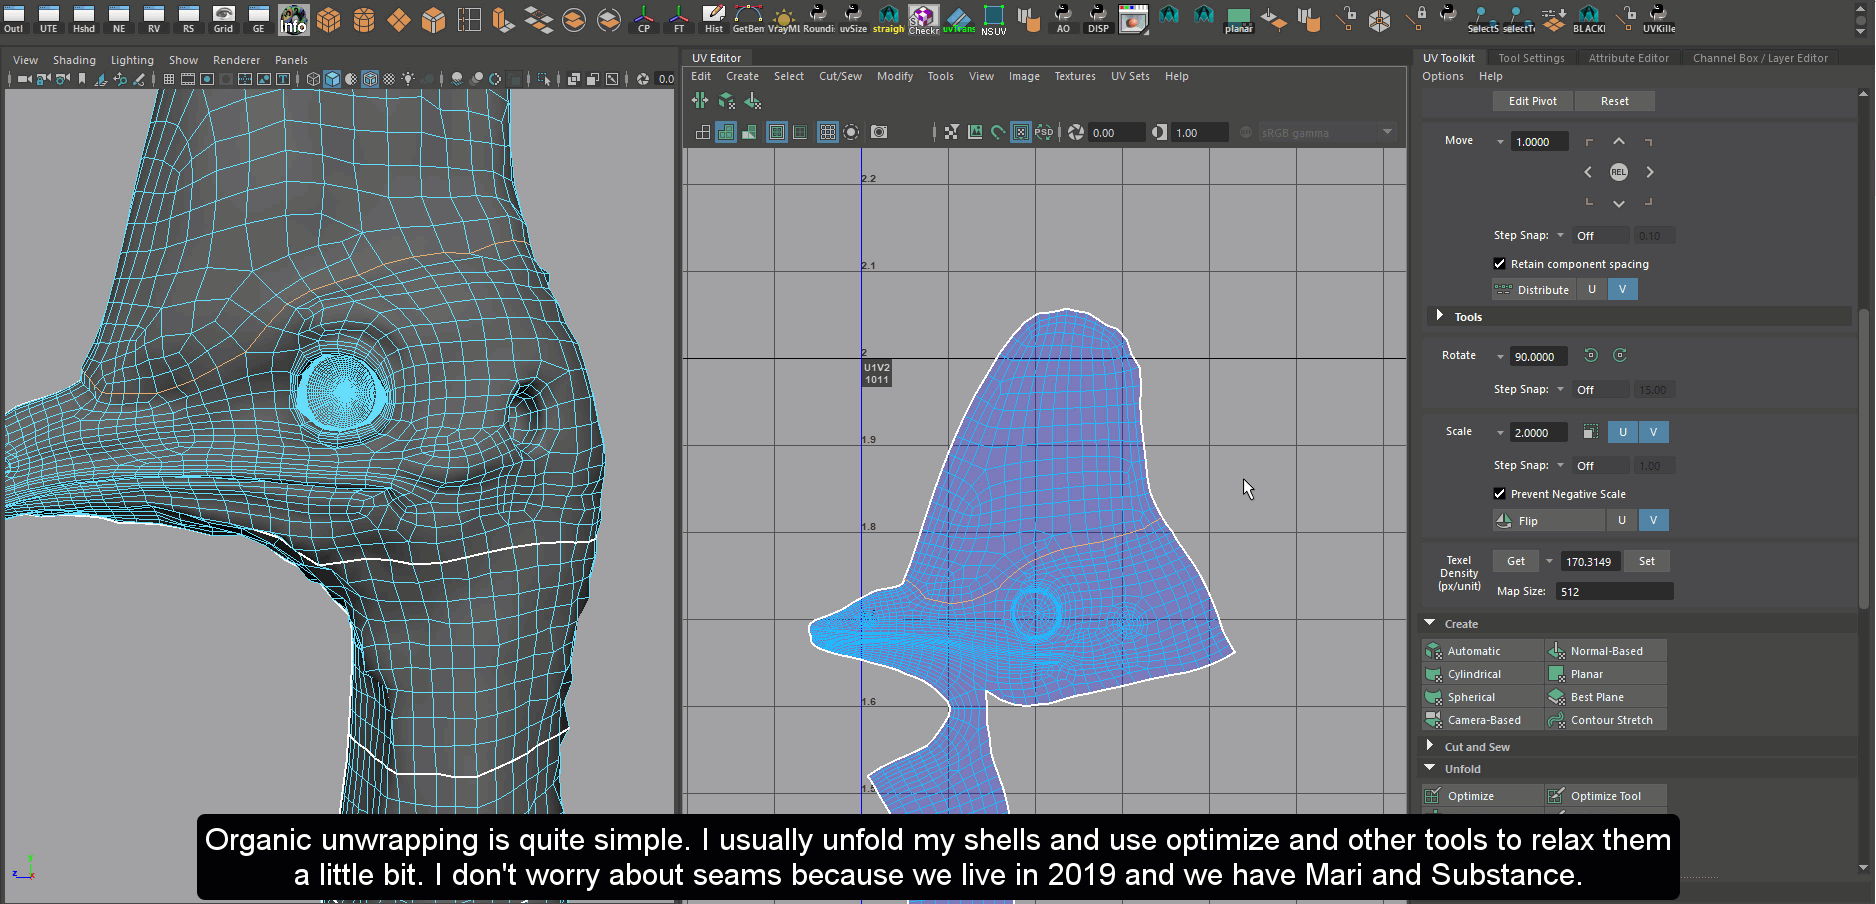
I use tools such as unfold, optimize to relax my UV shells. I don't care too much about visible seams.
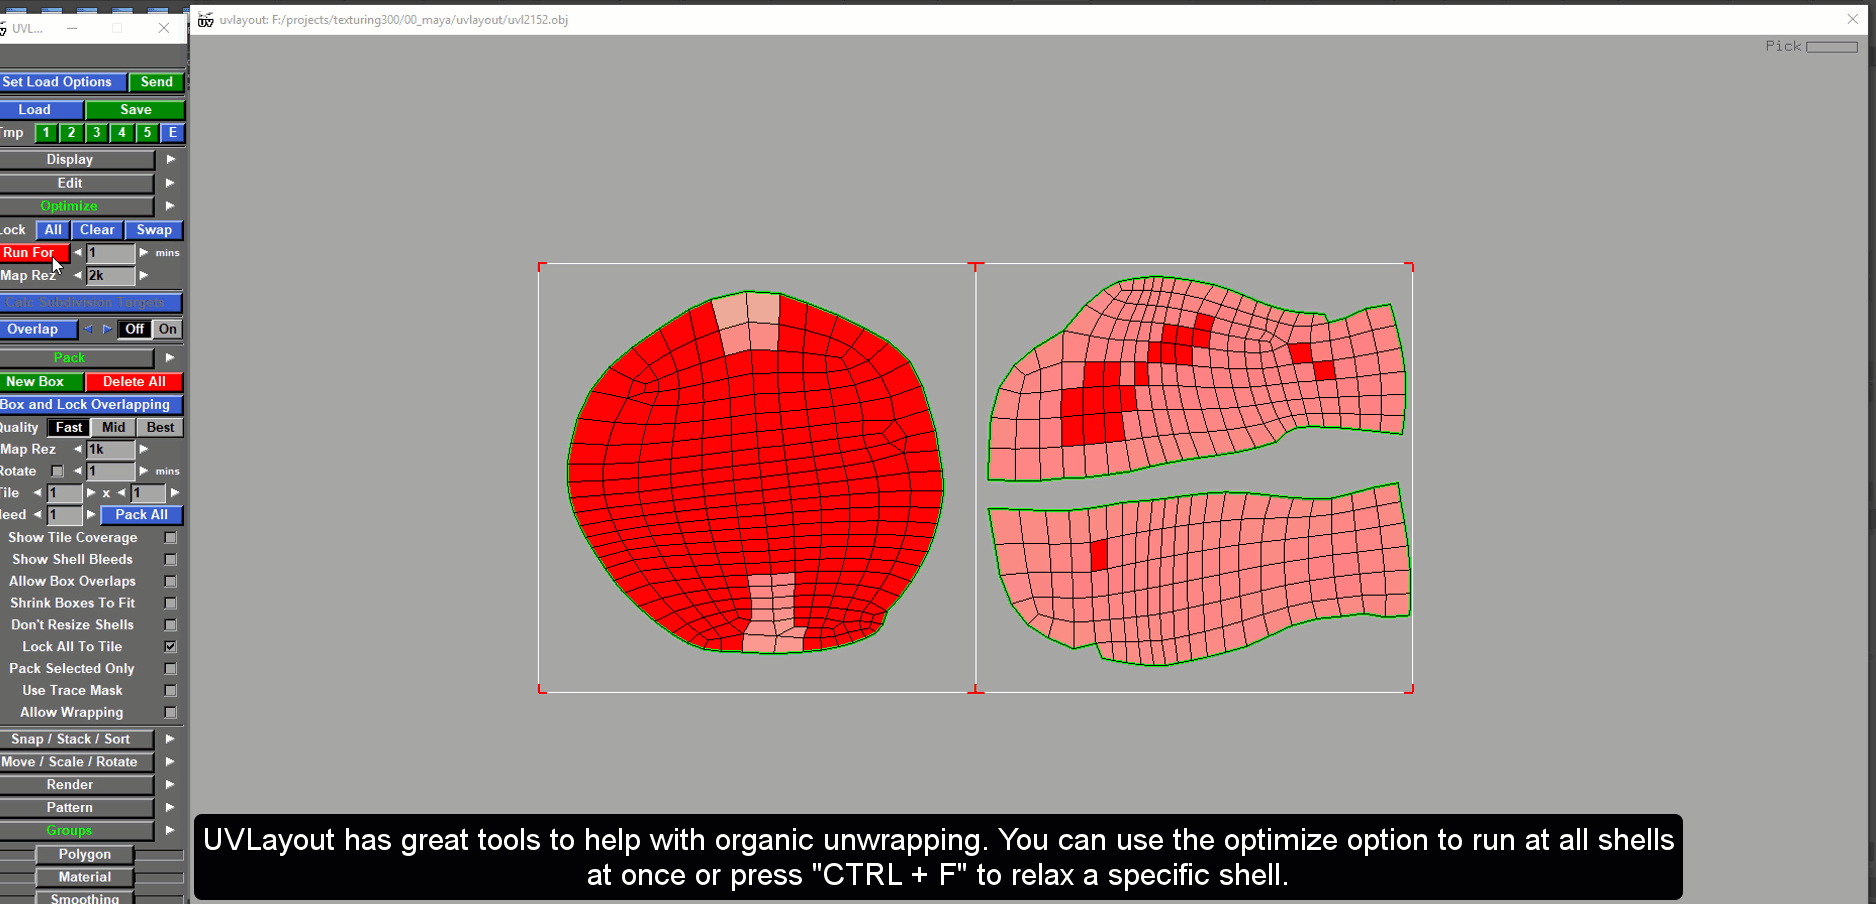
UVLayout can be super useful for organic models.
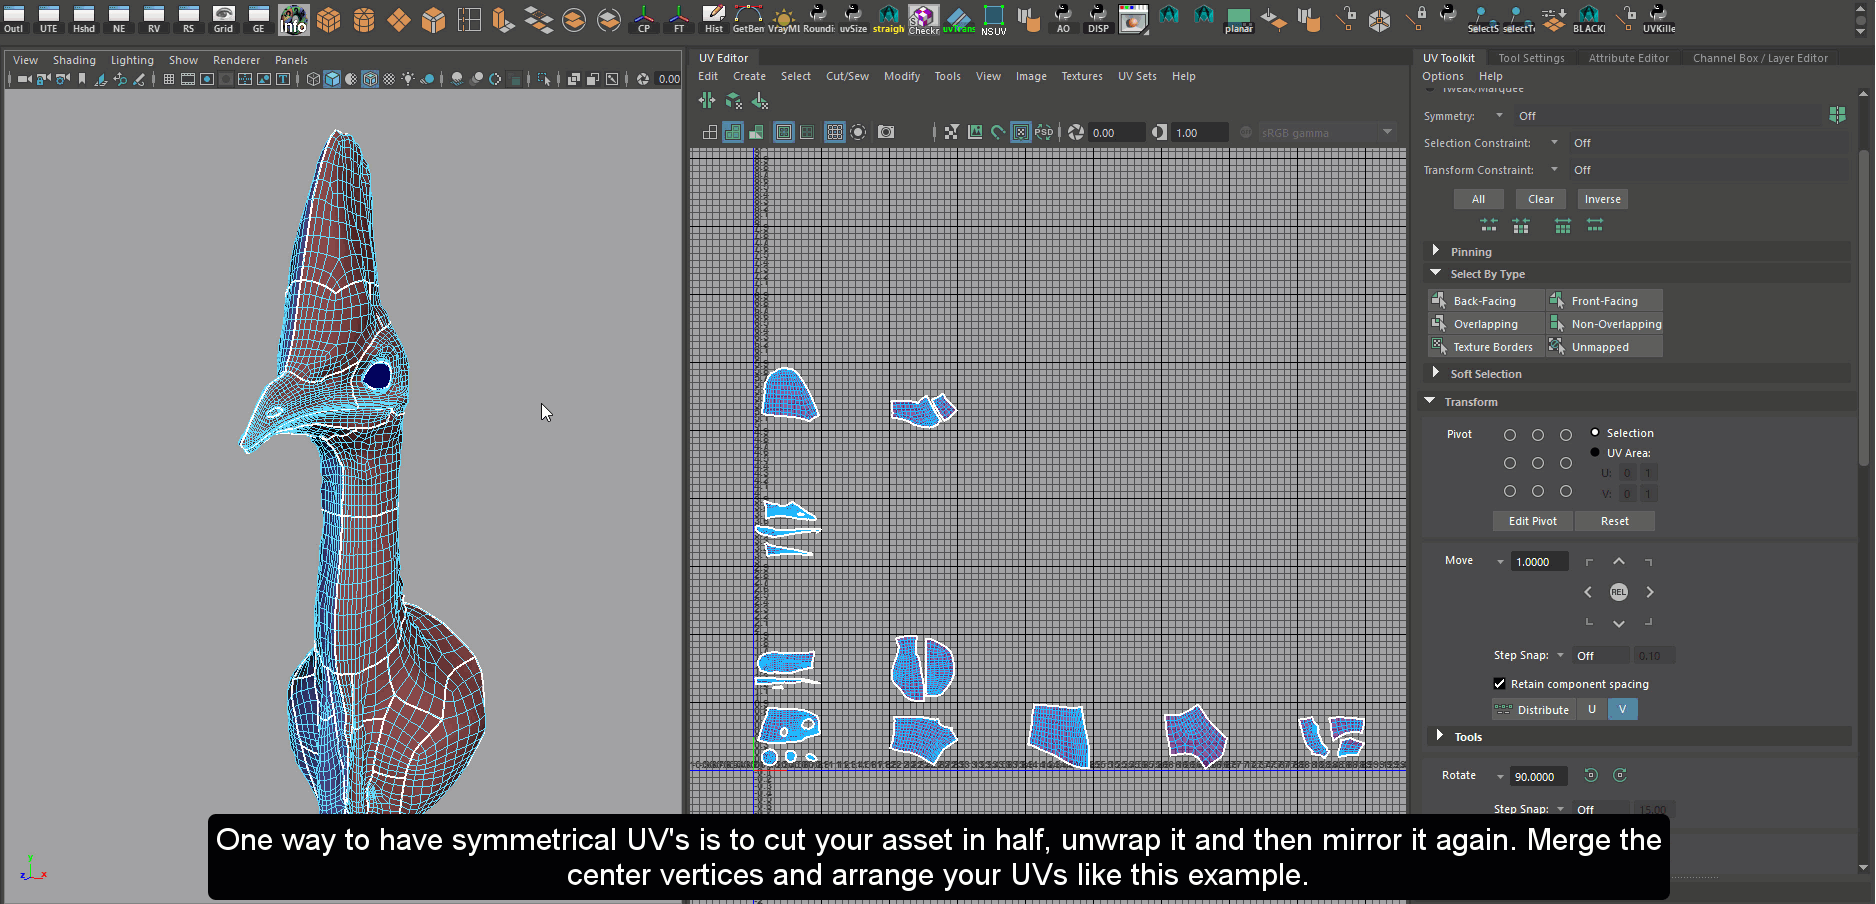
This method save me a lot of time!


